Showing posts with label Toddler Art. Show all posts

Monday, March 4, 2013

Painting with Water Beads

My two kiddos love to play with water beads.  I'm not a big fan because it seems like I chase those little beads around the house the whole time they are playing with them.  They are quite bouncy.....

So one afternoon I decided we would try to paint with them instead of just pouring, scooping, etc.  
And it turned out super fun.

It's kinda like marble painting, but better because the water beads bounce all around the paper.  They seem to move a little easier when covered in paint than the marbles do.

Anna really enjoyed it....and Drew enjoyed making a mess, so it was a win-win for us!!

You don't need much paint at all....just a few squirts.  The water from the beads makes the paint the perfect consistency.


I put paper in these shallow plastic containers and they were great for little hands to hold.


See....Drew enjoys just squishing the water beads and making a mess.


It was fun....and a new way to enjoy water beads!!


Thursday, November 15, 2012

Marbled Leaves

More shaving cream fun here!!

This week we decided to make leaves.  Shaving cream is always fun!  Anna squealed when I got out the cans!  

Click here for more directions and see how we do shaving cream art!!


Wednesday, September 19, 2012

Toddler Craft: Apple Tree


Big sister can't have all the fun, can she???

Drew was pretty excited when he saw the Apple Tree Craft Anna and I did, so I decided he should make his own little apple tree while she was off at preschool one morning.  

This craft is simple and fun, but can be kind of messy if your little one is like mine.  Drew definitely doesn't mind getting messy.

Supplies needed:
Paper plate
Sponge
Cork
Brown construction paper
Red and green paint


Start by taping down a paper plate.  Then hand your child a sponge with some green paint and invite them over to paint the plate.


Watch out....it gets messy fast with little fingers!!


(You can let the paint dry if you'd like, but we just skipped that step!!)
Then put a cork in some red paint and show your toddler how to stamp the plate with the cork to make an "apple".


Cut out a trunk from your brown construction paper and tape it to the bottom of your "apple tree".

Hang and admire!!


Thursday, August 16, 2012

Finger Painting on a Canvas


Finger painting on a canvas turned out to way more fun than I had expected!!

We are still down to just a few fun art and craft supplies in our house since most everything is packed.  I just kinda threw this together to give Anna something to do for the afternoon.

All you need is:
finger paint
canvas (You can get these on sale at the craft store all the time.  I got four for $10).


I set out several colors of finger paint and one of the noodle pieces from our "fun with a pool noodle" activity.  

She's not a big fan of getting her hands all messy so she used the pool noodle to paint (or smear) all over the canvas.


Then she just had fun doodling, drawing, writing....


(her self portrait!)


And we made hearts together...


And she practiced writing her name!

The best thing about finger paints and a canvas???  The paints wash right off the canvas.  I usually just spray mine down with our garden hose, let it dry overnight and then it's ready to go again.  Or you could always keep the fabulous artwork and hang it up somewhere if you'd like!!

Happy painting!

Tuesday, August 14, 2012

Fun with a Pool Noodle


Packing with two kids around has been just plain crazy.  And once all our "fun" stuff was packed I was left standing in my kitchen wondering how I was going to entertain my two for the rest of the week.  

So I went through our "goodwill" pile and found some things that worked out just fine!!

A pool noodle, spoons and paint!  Who would have thought a pool noodle could have provided a few hours of entertainment.


I took out a knife and cut the pool noodle into small pieces.  Then I handed them over to my son.  He enjoyed stacking them, knocking them over and then eventually throwing them....such a boy!


Once he seemed a little bored, I took out some spoons and showed him how to stick the ends of the spoons in the holes of the noodle.


He loved this and spent quite a while putting them through each hole.


For my daughter, Anna, I took out our paints and some bowls and let her do "noodle prints". 


They both enjoyed these little activities and we managed to get one more day of packing under our belts!!


Tuesday, August 7, 2012

Bubble Wrap Painting and Prints


Bubble wrap all by itself provides loads of entertainment.   Add paint you and you have a whole new activity!

I set this activity out for my two kids and they both really enjoyed playing with the paints and bubble wrap!


Little Man enjoyed popping the little bubbles the most, I think.


Anna painted her bubble wrap all different colors...


And then we pressed a piece of card stock on top of the bubble wrap to make a cool print.


An easy painting activity for almost any day!!


Tuesday, July 31, 2012

Making Olympic Rings


We are still loving, loving, loving the Olympics!!

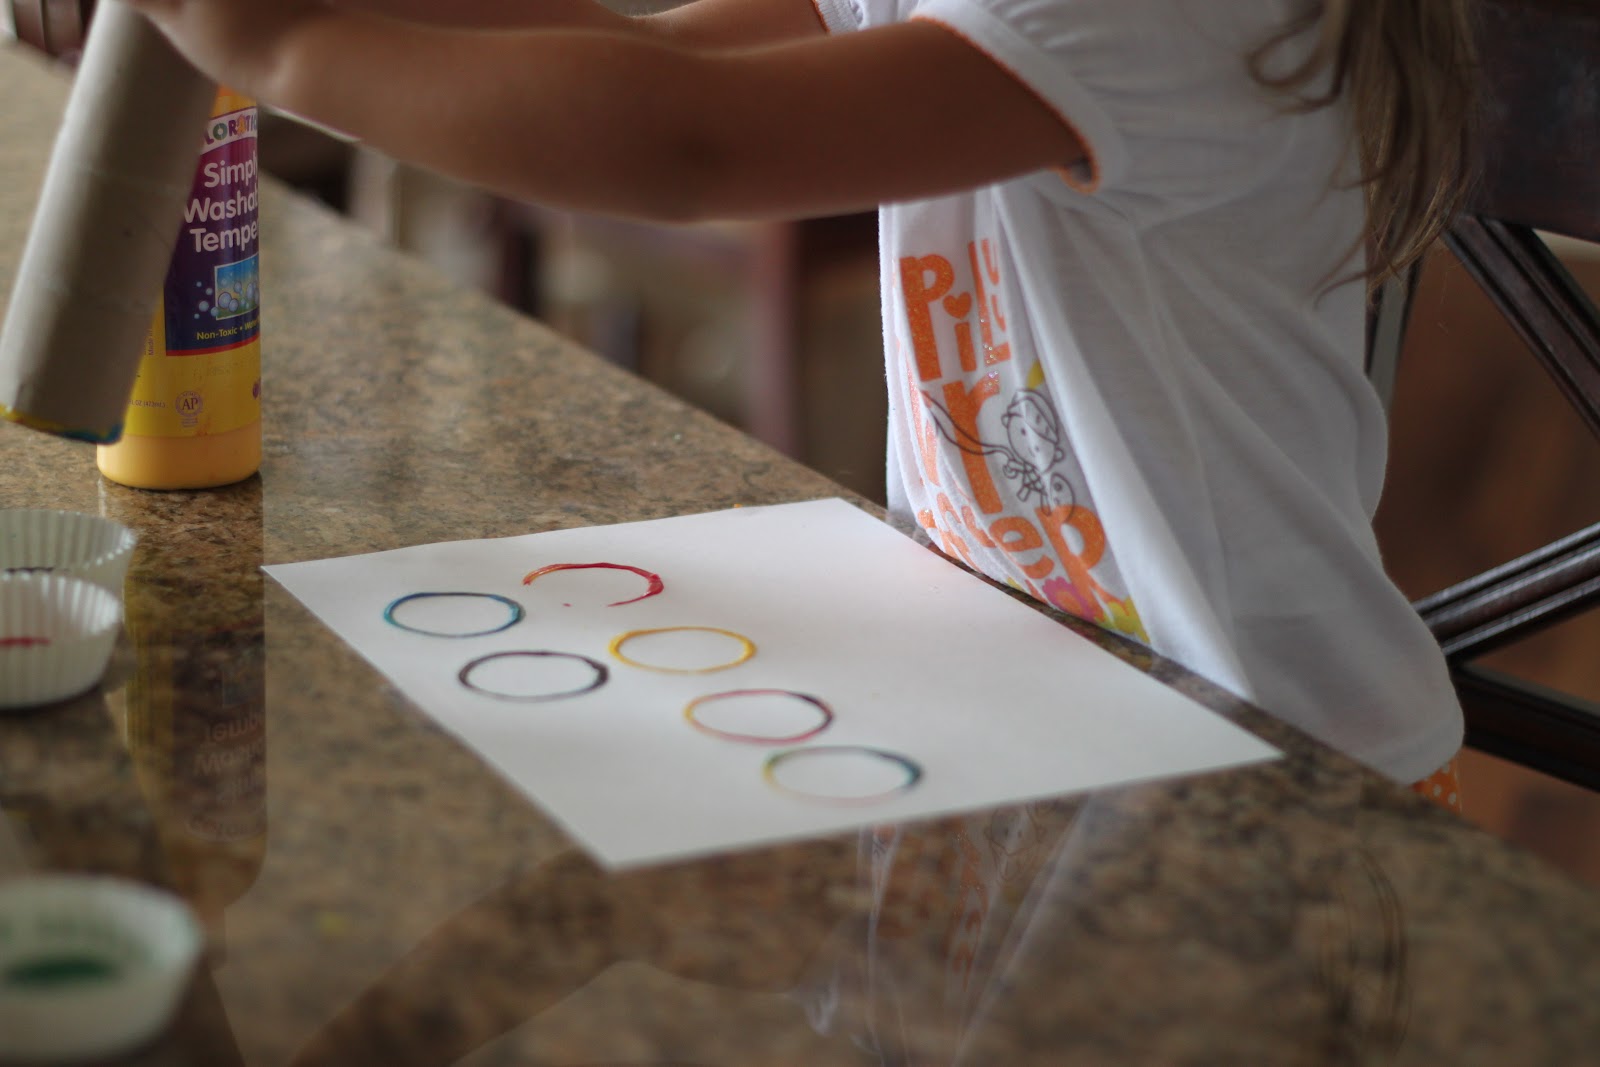
Making Olympic rings is a fun little craft to do in celebration of the Olympics!  So easy, so simple!

Supplies needed:
Paint (red, blue, yellow, green, black)
Paper
Paper towel or toilet paper roll


For my little man, I just gave him a little cup of paint and let him stamp his paper with the paper towel roll.


For Anna (age 3 1/2), we talked about the Olympic rings and how they symbolize the Olympics.  She called out the colors used and helped me pick them out.  Initially she just wanted to stamp the paper, which was fine.  Together we made the five Olympic rings on the bottom of the paper.


Anna's 


Drew's

Love them both!

Friday, July 20, 2012

Summer Fun: Finger Painting with Shaving Cream

One of the activities on our Summer Fun List is to make shaving cream books.  We've done lots of shaving cream art and it's probably the most requested activity in our house.

Usually we use a spoon or some type of stirring device, but this time we decided to throw caution to the wind and do some finger painting with shaving cream.


After you squeeze your shaving cream into your pan....


Have your kiddo mix it all up with their fingers.  For the prettiest results, try to leave some the swirl-y patterns you see above.


Press your paper onto your shaving cream design and lift up.  Let it sit for about 4-5 minutes before scrapping off all the shaving cream.

You'll be left some awesome colors and awesome patterns.


And...if your sweetie is like mine, she'll probably want to play around some more!!

Happy painting!

Tuesday, June 26, 2012

Summer Fun - Table Top Tin Foil Painting


This is another fun little art activity from our Summer Fun List.  

I decided to change things up a little for the tin foil painting and covered my daughter's little table with tin foil.  I used painters tape so it was easy to remove and it worked really well.  We've done something similar in the past but we covered the table with a variety of different papers.


I also read somewhere to mix the paint with a little bit of dish soap, so we did.  I'm not sure it made much of a difference.


My daughter, Anna, really enjoyed painting "on the table".  It was something fun and new for her!


Wednesday, June 6, 2012

DIY Tabletop Art Easel


I saw this idea during one of my Pinterest browses and thought it was pretty genius.

My son and daughter love to paint.  Well....my daughter loves to paint.  My son loves to paint paper and eat paint....silly boy.

I put these two easels together while we were traveling at our Mimi and Poppy's house.  The kids had a great time using them and I even toted them home for use here!  


I didn't follow any sort of tutorial, but it's pretty easy to figure out.  Just cut off a part of a box and then loop the two ends together to make a triangle shape.  I taped the bottom two pieces together with scotch tape and they have held up great.

I added a little close pin to Sweet Girl's so she could easily change out her paper.  Little Man just gets a piece of tape.  That close pin would be waaaaay too distracting for him!  


I also keep our used egg cartons and recycle those as paint holders.  They work out perfectly and are easy for tiny hands to hold!


Happy painting!


And are you following Playing House on Facebook?  Click here to "like" us and follow along!

Related Posts Plugin for WordPress, Blogger...