Tuesday, July 31, 2012

Making Olympic Rings


We are still loving, loving, loving the Olympics!!

Making Olympic rings is a fun little craft to do in celebration of the Olympics!  So easy, so simple!

Supplies needed:
Paint (red, blue, yellow, green, black)
Paper
Paper towel or toilet paper roll


For my little man, I just gave him a little cup of paint and let him stamp his paper with the paper towel roll.


For Anna (age 3 1/2), we talked about the Olympic rings and how they symbolize the Olympics.  She called out the colors used and helped me pick them out.  Initially she just wanted to stamp the paper, which was fine.  Together we made the five Olympic rings on the bottom of the paper.


Anna's 


Drew's

Love them both!

Monday, July 30, 2012

Olympic Medals


Do you have Olympic fever yet???  We definitely do!  We've been counting down the days until the Olympics all month and we are just giddy with excitement that they are finally here.  I completely feel like I'm a kid watching them!
This week will be all about the Olympics!!  We have tons of stuff to do to celebrate this awesome event!

First up is Olympic Medals.

I saw the idea over at The Imagination Tree.  We used our regular salt dough recipe which consists of: 

1/2 cup table salt
1/2 cup warm water
1 cup of flour

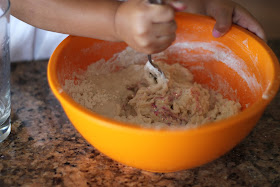
Mix everything together and knead for about 5-10 minutes until it's softened and smooth. 


We added glitter to our medals to make them sparkle some!


And then Anna decided to add ALLLLL of the glitter!


Roll out your sparkly salt dough and then cut out circles (we used a cup to cut out our shapes).


For the numbers, we used some of our letter/number magnets and just pressed them into the dough before we baked them.  Don't forget to add a little hole at the top of the medal for your ribbon (we used a straw).

Bake the medals at 200 degrees for about 2 hours.


Once cooled, paint them gold, silver and bronze!


Now go have races around your house!  Hope you win first place!

Friday, July 27, 2012

A Flower Garden

We made a beautiful flowery garden using cupcake liners and pipe cleaners the other day!  Oh...and glitter.  Anna always asks for glitter....always.

They are easy to make, and other than the glitter, aren't that messy.


Supplies needed:
cupcake liners
paint
glitter (optional)
pipe cleaners
paper
glue


Start by painting the inside of your cupcake liners.


Sprinkle in some glitter if you'd like.


Glue down a few pipe cleaners onto your paper.  (I recommend using a good amount of glue.  The pipe cleaners like to roll around a little.)


Then glue on the tops of your flowers!  


Happy creating!

Thursday, July 26, 2012

Face Painting Fun


Want to have an hour to yourself???

Sounds amazing, right?

I have the answer!!  Face painting!!

I picked up a face painting kit at the craft store a while back and totally forgot about it!  Anna wanted to "do something fun" so I pulled it out and she went nuts!  


First she asked for a rainbow on her cheek...


Then she decided to paint a rainbow on her arm...


And then she started to get a little crazy...


And even crazier!!!


Even the poor baby got painted!


So...go pick up some face paint, grab your coffee and a book and let your kiddo have some fun!!  I highly recommend face painting for preschoolers!!


Wednesday, July 25, 2012

Easy Gum Ball Craft

For some reason, my daughter kept requesting to do a "gum ball craft".  I wasn't really sure what she had in mind, but this is what I came up with.  It turned out to be a lot of fun and she enjoyed it!!


Start by cutting out a circle and a square from card stock or construction paper.  (Have your child do the cutting if they can...).  Then glue the circle onto the square to make your gum ball machine.


Add a little dispenser...because...."mom...where is the gum ball going to come out?" (Love her.)


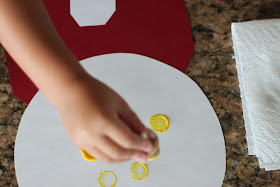
Then use a round object to stamp your gum balls all over your gum ball machine.  We used a wine cork.


And if you want to have more gum ball fun, check out our gum ball machine post from last year!  We brought it back out after we made our new gum ball machines and got to work adding more colorful gum balls! 

Monday, July 23, 2012

Dancing Ballerinas

I set up a little craft for Anna the other day while little brother napped.  She's completely obsessed with ballerinas (and mermaids too) so she loved it.  We've made quite a few dancing ballerina since.

Click here for the ballerina template and to see where I got the idea from!
We used cupcake liners as the tutus and Anna really loved that!  


Friday, July 20, 2012

Summer Fun: Finger Painting with Shaving Cream

One of the activities on our Summer Fun List is to make shaving cream books.  We've done lots of shaving cream art and it's probably the most requested activity in our house.

Usually we use a spoon or some type of stirring device, but this time we decided to throw caution to the wind and do some finger painting with shaving cream.


After you squeeze your shaving cream into your pan....


Have your kiddo mix it all up with their fingers.  For the prettiest results, try to leave some the swirl-y patterns you see above.


Press your paper onto your shaving cream design and lift up.  Let it sit for about 4-5 minutes before scrapping off all the shaving cream.

You'll be left some awesome colors and awesome patterns.


And...if your sweetie is like mine, she'll probably want to play around some more!!

Happy painting!

Thursday, July 19, 2012

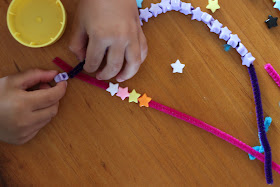
Star Necklaces and Bracelets

This was an "invitation to play" that I set out for my daughter one afternoon.  We both had the best time making necklaces and bracelets for pretty much everyone we know.

It's so simple and so perfect for those fine motor skills!

All you need is some pipe cleaners and some beads (I used some star shaped beads I picked up at the craft store a while back).


Check out all our invitations to play here.


Wednesday, July 18, 2012

Family Memory Game


This family memory game has been on my to-do list since I saw this post from Charla Anne.
It took a while to find all the right pictures, print them and cut them out, but the finished product is so seriously awesome.

My daughter loves playing this game and it's really neat to see all the pictures.  I bet it will be even cooler in a few years when my two kiddos are older.

It would be an awesome birthday or Christmas gift too!


Tuesday, July 17, 2012

Making Fireworks

To celebrate Fourth of July this year, Anna and I made fireworks.  They were pretty fun to make and I'm pretty sure Anna could have used up all our glitter on these fireworks!

(Idea found at Juggling with Kids)


Start by taking two pipe cleaners, folding them in half and then twisting the end that is looped.  Once your end is twisted, separate the other ends of the pipe cleaner to make a "firework" design.


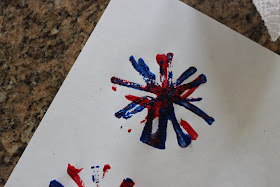
Then dip your "firework" in your paint (we used red and blue).


And press it onto your paper.


Dip your firework in the other color and press onto the first shape made.


Keep dipping and pressing until you have a full firework.
You can add glitter if you'd like!  


Happy 4th!