Thursday, April 19, 2012

DIY Finger Paints


I'm on a big "homemade" art supply kick right now, so I decided to give finger paints a try.  We usually just use whatever paint we have handy for finger paints rather than buying actual paint labeled "finger paint".  

These paints turned out a little thick the first time, but with a little more water, they were great and super colorful.  I think I used waaaay more of the gel food coloring than I needed, but oh well.  They were a hit!


Supplies needed:
Salt
Flour
Cornstarch
Food coloring
Small containers


Start by mixing together 3 TBSP sugar, 1/2 tsp salt, 1/2 cornstarch and about 2 1/4 - 2 1/2 cups of water in a medium sized pot.   After it's well mixed, put over med-low heat and let it "cook" for a few minutes until it starts to thicken slightly.  If it seems way too thick, add a little more water, and stir.


Divide the mixture into your containers and then stir in a few drops of your food coloring.  (Side note....if you are using gel food coloring, you only need a teeny-tiny bit...)


Once they paints have cooled, it's time to paint your heart out.  (In the picture above, you can kinda tell how the first batch was a little thicker and clumpier than it should be).


This is our second batch...much smoother and much better!!

Enjoy!


And are you following Playing House on Facebook?  Click here to "like" us and follow along!

Wednesday, April 18, 2012

What's That? A Crayon Rubbing Game


I put together a fun little activity for Sweet Girl this afternoon.  We tried something similar last year, but I think she was too young.  Now, at 3 years, she was all ready to go and knew exactly how to rub the crayons.  


All you need is some random pieces of paper and some flat objects from around the house.  I cut out a few shapes from card stock, grabbed a leaf from one of our plants and cut out a piece of glittered foam.


Gather your papers/objects and hide them underneath a piece of paper.


Tape down all the sides with painters tape.


Then hand your crayons to your kiddo and have them rub the crayon across the paper to find the "hidden objects".  We used the awesome Stockmar crayons, but if you use regular crayons, just pull the paper off the crayon before hand so they can rub the crayon on its side.


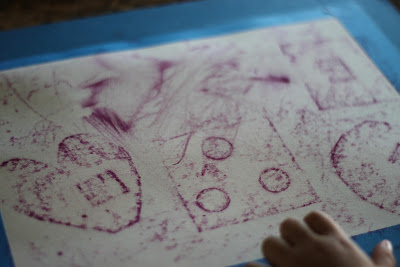
As your child rubs the crayons across the paper, the pictures/objects appear.  It's pretty cool!!  And it's great for object recognition.


I also used some of the dot stickers to make some letters.  


It took a little while for the letters to be recognizable, probably since they were made up from a bunch of circles, but Sweet Girl enjoyed it anyway!!


Tuesday, April 10, 2012

Toddler Art: M&M Painting


This didn't turn out to be the most colorful painting experience ever, but Sweet Girl really enjoyed painting with M&Ms.  It's really simple to do and it's definitely more about the process rather than the product.

Supplies needed:
M&Ms
Small cups
Paper
Water
Paintbrushes


Start by sorting out your M&Ms by color into individual cups.  Then add a little bit of water and have your child stir the M&Ms and watch the colors appear.


It is pretty cool watching the water turn the color of the M&Ms.


Then paint away.

Oh...and be sure to save some M&Ms for you and your little one!!  Yum!


Monday, April 9, 2012

Toddler Crafts: Bunnies


One last Easter craft....I promise! 
This idea is from Allie at No Time for Flashcards.  She used marshmellows to paint, which would have been awesome, but we didn't have any on hand.  We used cotton balls instead and they worked great.


Little Man even got in on the action!  He wasn't a big fan of the cotton balls!


And since we were using cotton balls, Sweet Girl instead ours needed cotton ball tails!

Sunday, April 8, 2012

DIY Easter Cards


We are really into our watercolor paints right now so we decided to use our paints to make our Easter cards this year.  They were really easy to make and turned out pretty cute.

Supplies needed:
Watercolor paint and paint brushes
Watercolor paper
Painters tape
Cardboard


Start by cutting out an egg shape from your cardboard.  Then tape down your watercolor paper to your table (to keep it from sliding while painting) and then position either the egg or egg cut out on your paper and tape down with painters tape.


Then paint away.


After your paintings have dried, glue them onto folded cardstock to create simple Easter cards.


Saturday, April 7, 2012

Toddler Craft: Easter Egg Wreath


This is a simple and easy Easter craft.

Supplies needed:
Construction paper
Scissors
Glue

First, cut out some eggs and a large circle from your construction paper.


Then add some glue around your circle and let your kiddo glue on the eggs.


Have them overlap the eggs as they go around so your wreath is nice and full!


Add a second layer of glue onto of the first layer of eggs and then glue on a second layer.

Hang and enjoy!!

Friday, April 6, 2012

Easter Egg Bird Feeders


We are big fans of homemade bird feeders at our house!  For Easter we decided to make a few to hang out for all those little birdies.  You can make one too!  Here's how...

Supplies needed:
Plastic eggs
Shortening, peanut butter or icing
Bird seed
String


Start by threading your string through the hole in your plastic egg.  Tie a knot at one end to keep the string from coming through the hole.  Then tie a know at the other end.  Pull all the string into the egg so you can add the shortening/peanut butter without it coating the string.


Coat your plastic egg in your shortening, peanut butter or icing.


Then roll your egg in the bird seed.


Once your egg is fully coated, pull out the string and head outside!


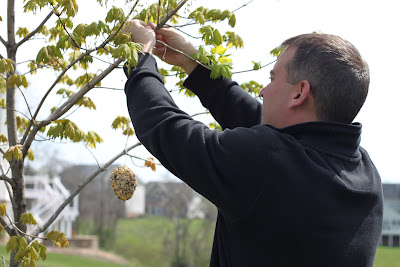
Even handsome hubbies liked this craft!

 
Happy Easter!
Related Posts Plugin for WordPress, Blogger...