Thursday, November 17, 2011

December Daily Cover - Tutorial

Thank you for all the super sweet comments you all left yesterday and the day before!!  I just loooove getting comments!!  :)  And I'm so loving this December Daily!!  I can't wait for December to begin!

I received several questions and requests for how I made my white circle paper so I decided to put together a simple little tutorial.  Really...it's that simple.

(Click here and here to see my cover and album)


Here are the super easy directions!!

Supplies:
You'll need two pieces of white paper, white metallic dimensional paint (I used fabric paint since that's what I had on hand), Mod Podge or something equivalent and some type of round lid.

I found my paper at JoAnn Fabrics.  It has a little bit of a texture to it and it has these really pretty flecks of gold and silver throughout.  The tag on my paper said it's from The Paper Company and is called Celebration White.  You will need two 12x12 sheets if you are trying to cover the album included in the Studio Calico December Daily kit.

So the first thing you do is stamp your paper using your lid.  I just squirted a little bit of my white dimensional paint on a plate and laid my lid down in the paint to coat the edges.


Then "stamp" your paper.


This is what it looked like when I removed my lid.  You can see where the lid moved a little while I was "stamping", but that's what I loved best about the circles....how they weren't perfect.


Then just stamp all over your paper.  I left a little space in between each circle because I knew I was going to go back and stamp them several more times.


Continue stamping your circles until you are satisfied with how they look!  I tried to overlap them a little.


Here is what it looks like after 4 stamps.  That's about how many times I stamped each of my circles. 

Your next step is to cover your album.

I didn't take pictures of this part, but basically I just painted my album white, trimmed my paper, rounded the corners and adhered with Mod Podge.

One 12x12 sheet (with about 3 inches trimmed from the bottom) will cover the entire front, spine and a little of the back of the album.  I trimmed the second 12x12 sheet to fit the back perfectly and then Mod Podged that on.

And that's it!!

Happy crafting and please let me know if you have any questions!!


Wednesday, November 16, 2011

December Daily - Foundation Pages 14-25


Thank you so much to everyone who left sweet comments yesterday!!  I had so much fun putting these foundation pages together and I'm so happy I have a blog to share them on!!

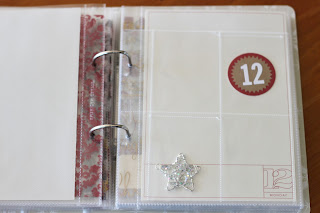
Here are pages 14-25!
(Click here to see the cover and pages 1-13)


My goal is to try to keep up with my pages daily, but with two little ones, we'll just have to wait and see.  My "plan" right now is to try to upload my completed pages on the weekends!!
Thanks again for visiting!!

Tuesday, November 15, 2011

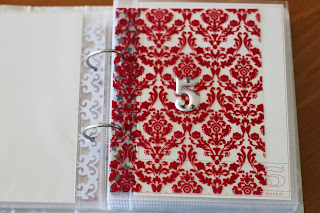
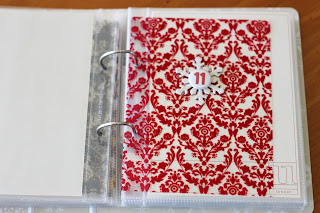
December Daily - Cover and Foundation Pages 1-13


I am so excited to share my December Daily album cover and foundation pages.  I've anticipated this time all year long and it's a little bittersweet that the making of the album has already come and gone.  For those of you not familiar with December Daily, you just have to go check out Ali Edwards and her amazingly inspirational December Daily posts.  Basically, it is a month long project documenting the 25 days leading up to Christmas (which just happens to be my most favorite time of the year)!!


The cover of my album is completely inspired by Ali's cover from last year . I loved the look of the white circle speciality paper she used so I decided to try to make my own. I just love how it turned out!!

The felt poinsettia with the "December 2012" button is inspired by Nicole Reaves amazing December Daily album. 

And here is the "base" of my album.  It's prepped and all ready for December 1st to roll around!!  I decided to go with 6x8 transparencies inbetween my pages.  I had originally planned to make them the same size of the page protectors, but I would have had to use one transparency per page and that was just too costly for me.  Using the 6x8 size I was able to get two per transparency.  Most of my inspiration came from looking through different albums on Pinterest. 


If you made it this far, thanks so much for looking!!  I'll be back tomorrow with the remaining pages.

Update:  Click here to see pages 14-25

Monday, November 14, 2011

Baby Fun - Finger Painting


Now that Little Man is almost ONE (can you believe it??) and isn't putting EVERYTHING in his mouth now-a-days, he is able to play along with us during our craft time!


He loves "finger painting" with yogurt and puddings.


He was a little hesitant at first, but quickly got the hang of it and enjoyed playing around!


(Look at those chubby little fingers!)


I used construction paper and yogurt here, so the paper easily soaked up the water from the yogurt and the paper was super easy to rip.  I'm pretty sure this was his favorite part.


Then the paper had to go because he was ready to eat it, so it was he ended up just using his highchair tray.

It's obviously a little messy, but it's great for introducing textures and temperatures to little ones.

Friday, November 11, 2011

Painting Leaves

We went out for a little nature walk yesterday and Sweet Girl gathered some leaves.  She asked to paint them, and although they were already dried, I decided to let her go ahead.  She really enjoyed it and spent quite a while painting them.  I would have never thought to paint dried leaves, but I'm so glad we did!!


I taped the stem and top half of the leaf onto the paper so it wouldn't move around.  Sweet Girl still isn't much of a fan of getting her fingers dirty so I thought that would help.


Happy Fall!!

Thursday, November 10, 2011

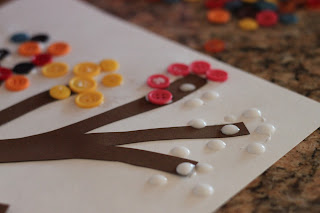
Fall Button Tree

Sweet Girl and I made the cutest little Fall tree branch today.  I had some extra buttons lying around that were "Fall-ish" in color and she asked to make something with them!!


I cut out a branch from some brown cardstock and had her glue it onto the white paper.  Initially, she added the glue dots for the buttons, but I think she got tired of doing it, so she asked me to help. 


This simple little activity turned into quite a fun little learning experience.  Sweet Girl sorted all the colors by shades (there were some lights and darks of the same colors) and sizes. 


She was adamant about grouping all the same color "leaves" together.  And I really think she was a little disappointed when she used up all the pinks.  This would have been an all pink tree branch if she could have her way!!


Ah....the colors of Fall!
Related Posts Plugin for WordPress, Blogger...